The Stitch Incoming trend originated on TikTok; however, it is being repurposed and adapted in other ways on other social media platforms. The trend usually revolves around short-form content: people “stitch” together videos by other creators and add their own opinions, analyses, and reactions.
Some creators use the trend to build upon someone else’s content, often adding more details and perspectives.
The phrase “Stitch Incoming” is typically placed at the top of the video at the beginning as a text overlay, letting viewers know commentary, more details, or a reaction is coming.
The trend allows the “stitching” creators to gain exposure while giving appropriate credit to the original creators. While other platforms (like Shorts and Reels) welcome the trend, TikTok makes it the easiest to recreate it. (Don’t worry, we’ll tell you how below.)
The trend has acquired significant traction on platforms as a tool for discussion, which, in return, boosts creators’ exposure and engagement. The phrase “stitch incoming” serves as a hook for the audience – they now have something to look forward to after the preceding clip.
How To Do The Stitch Incoming Trend On TikTok
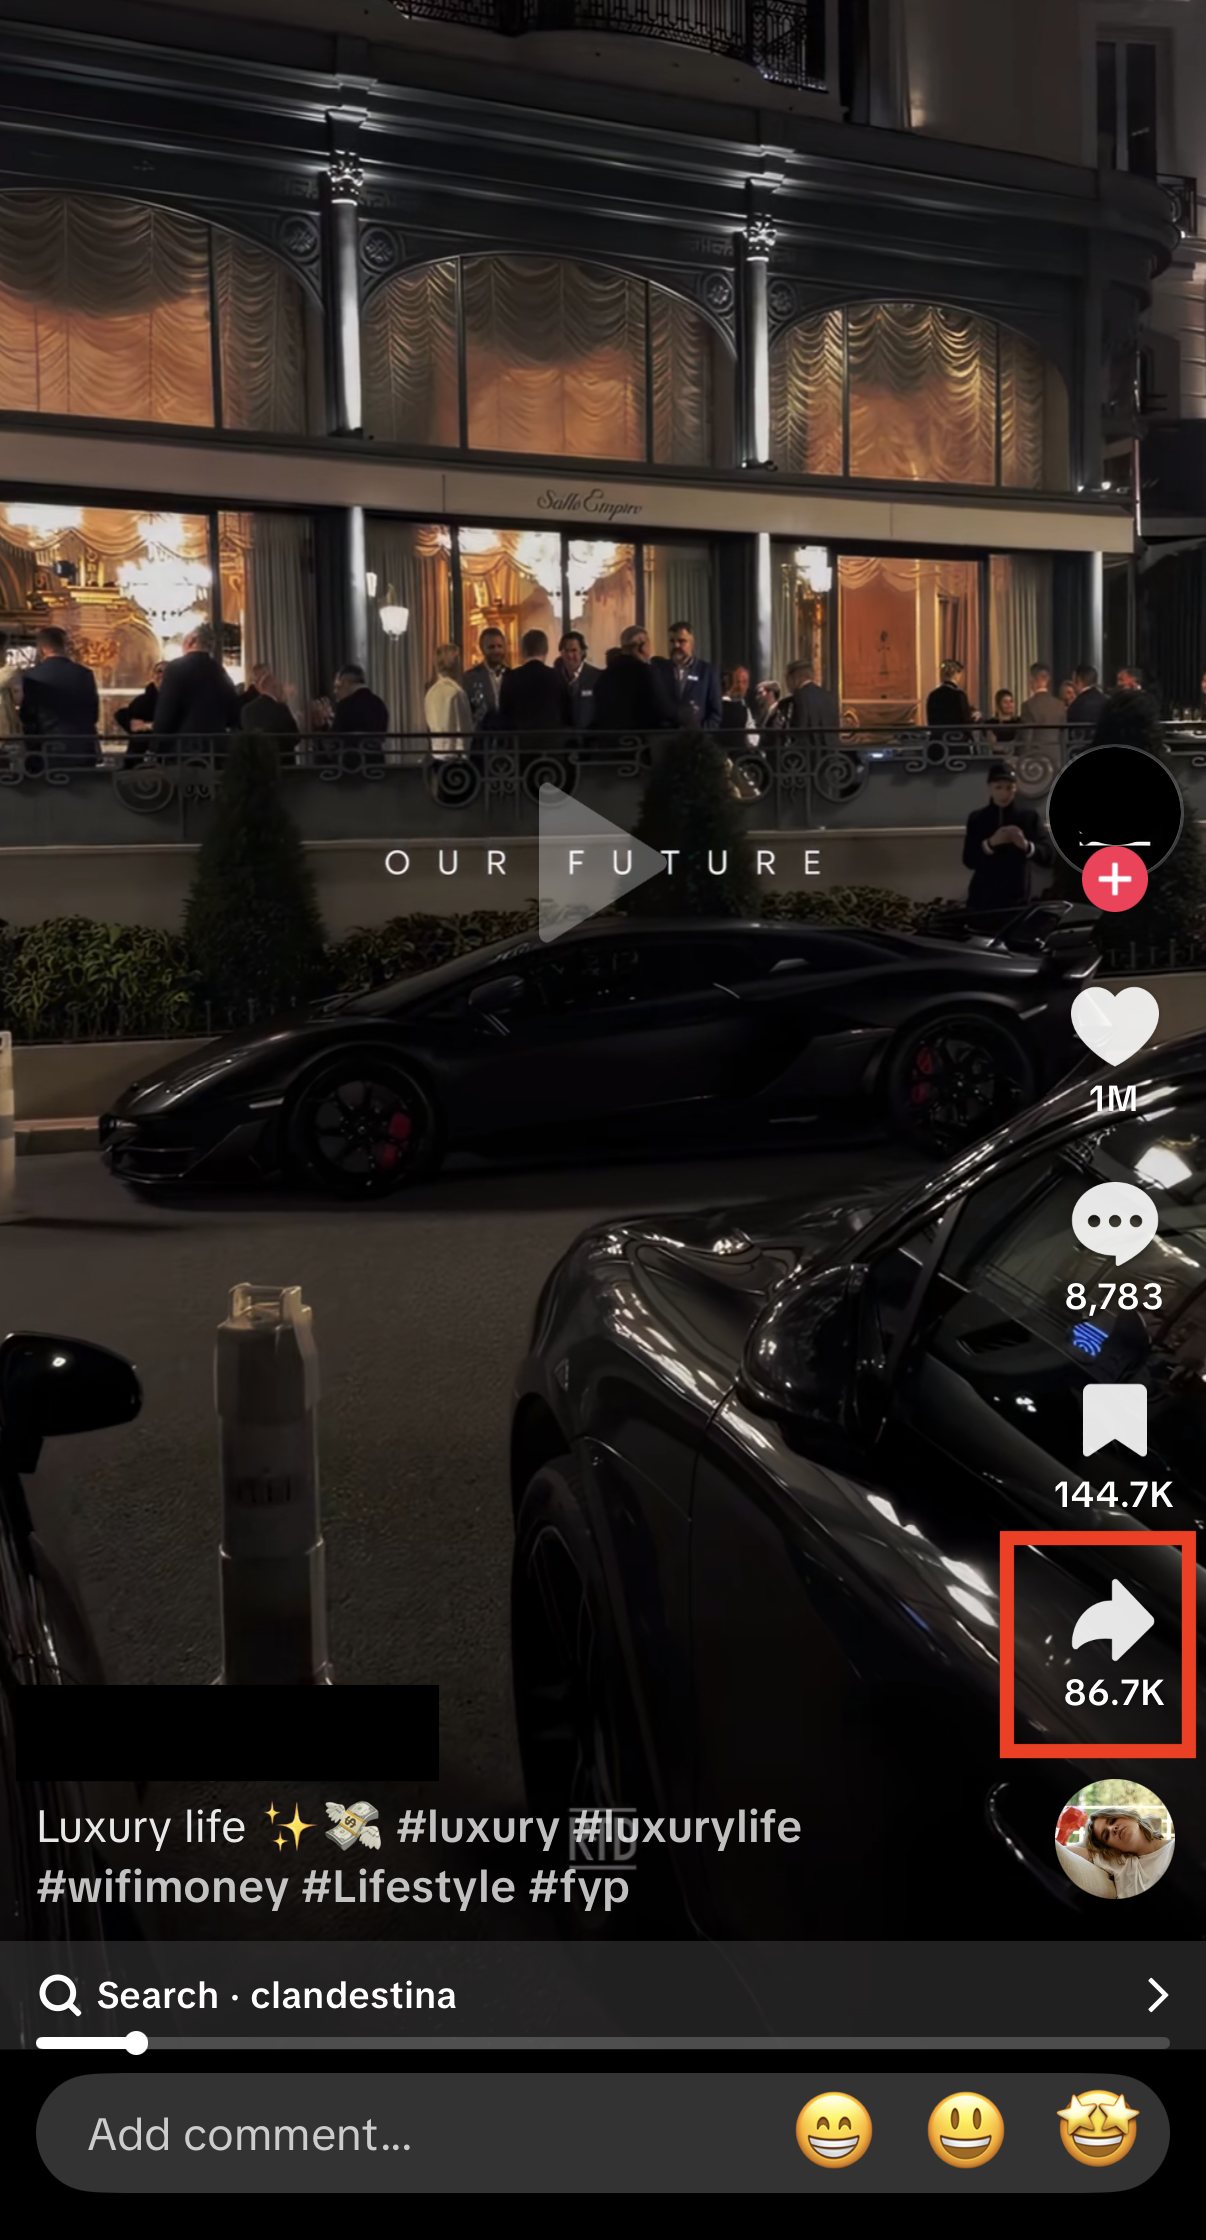
- Browse your FYP to find the video you want to stitch. Note that not all videos can be stitched – the original creator needs to have the stitch option enabled so others can stitch their video.
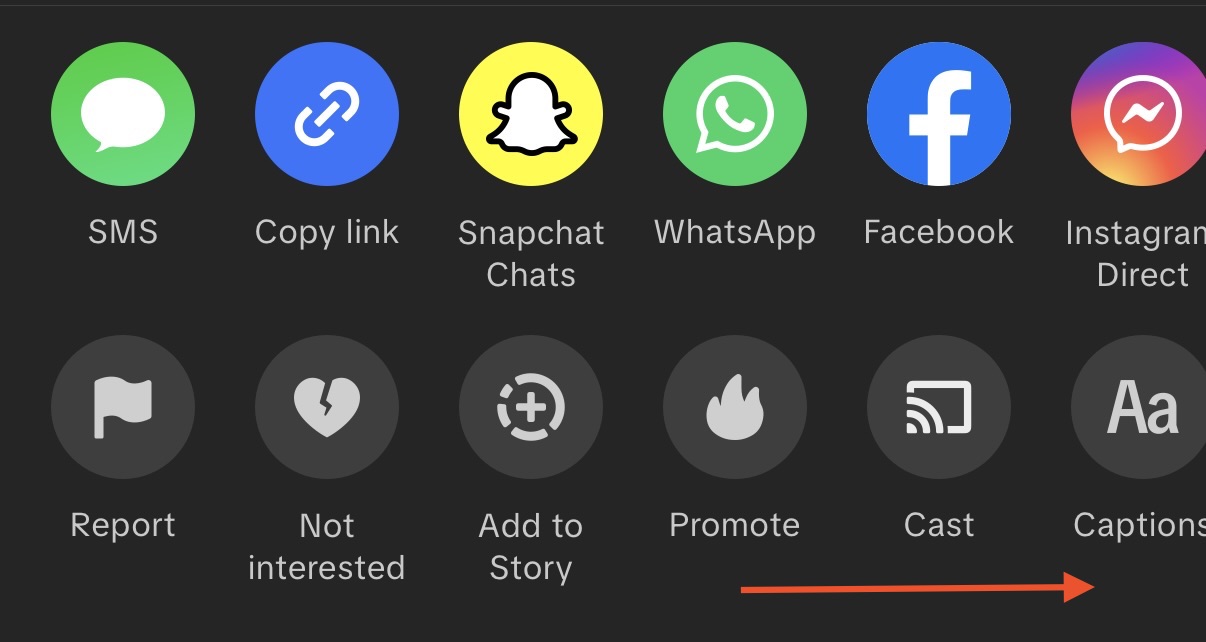
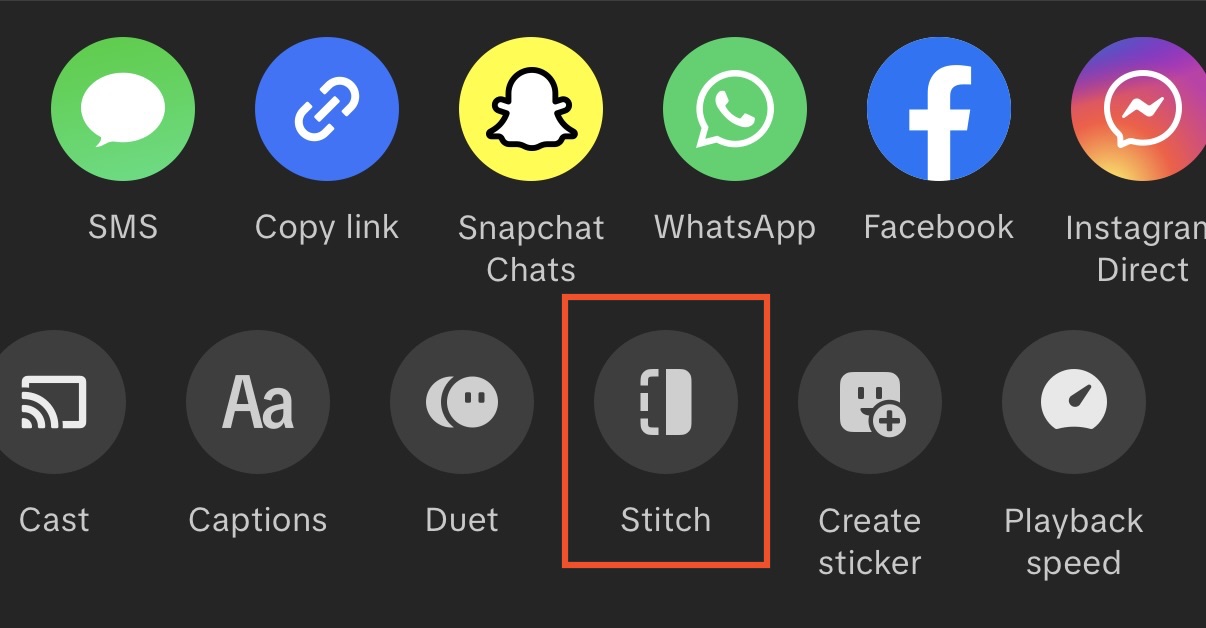
- Once you’ve found the perfect video, click the Share button, and scroll to the right on the bottom row until you see the stitch option.
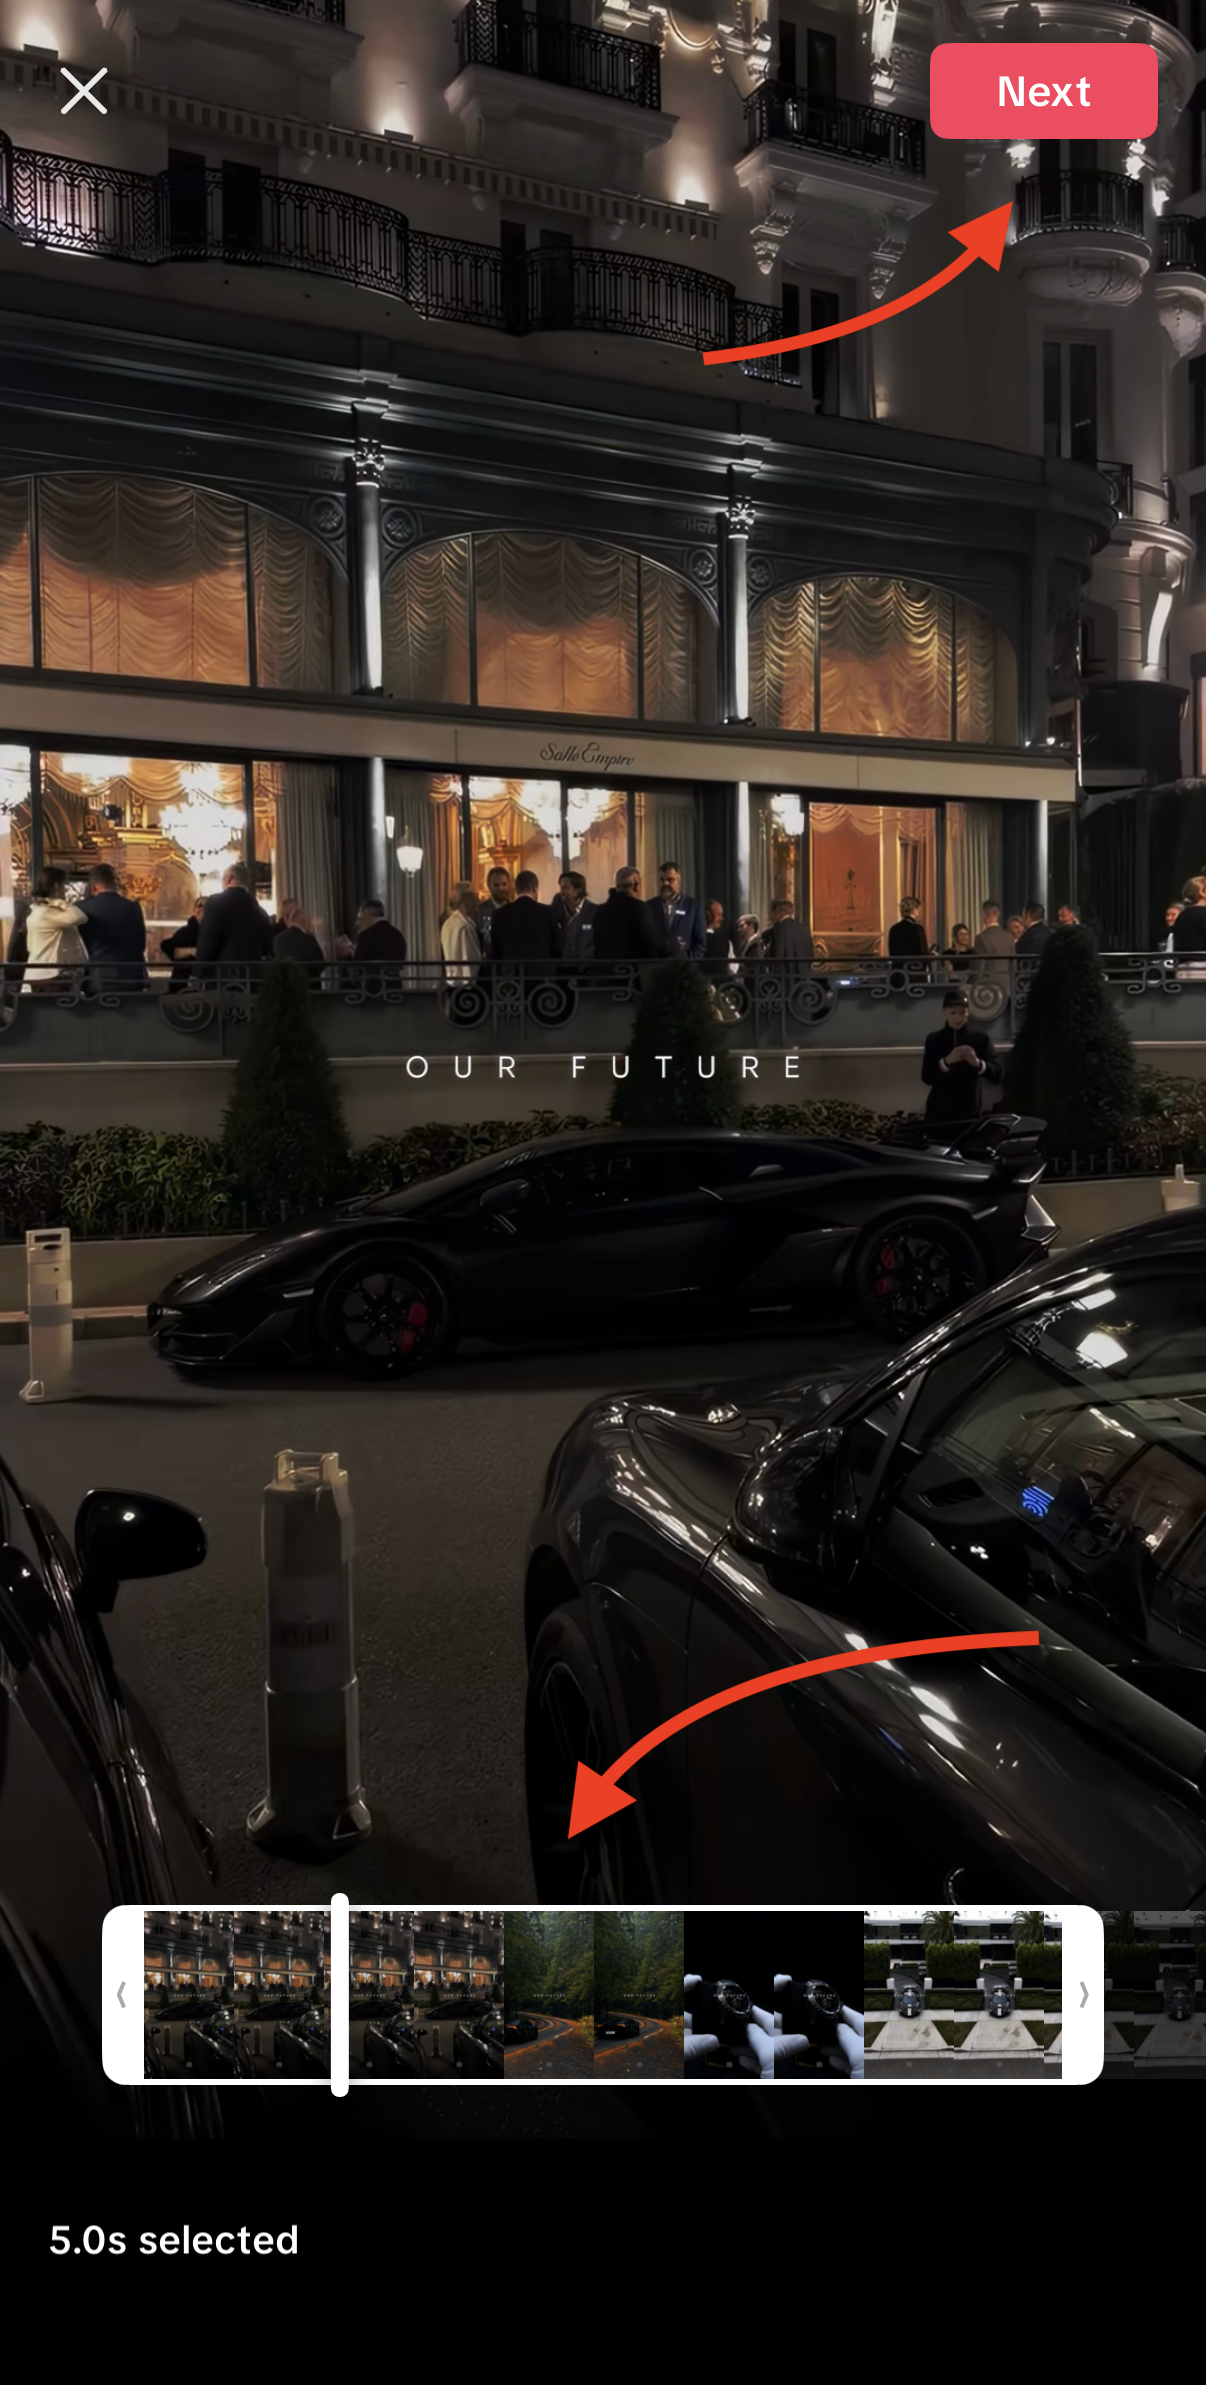
- Once you’ve initiated the stitch, you will see a trimming interface. Select the part of the clip you’d like to react to or comment on. The stitch option allows you to select up to 5 seconds of the original clip. Use the slider to select the perfect 5 seconds, then click next.
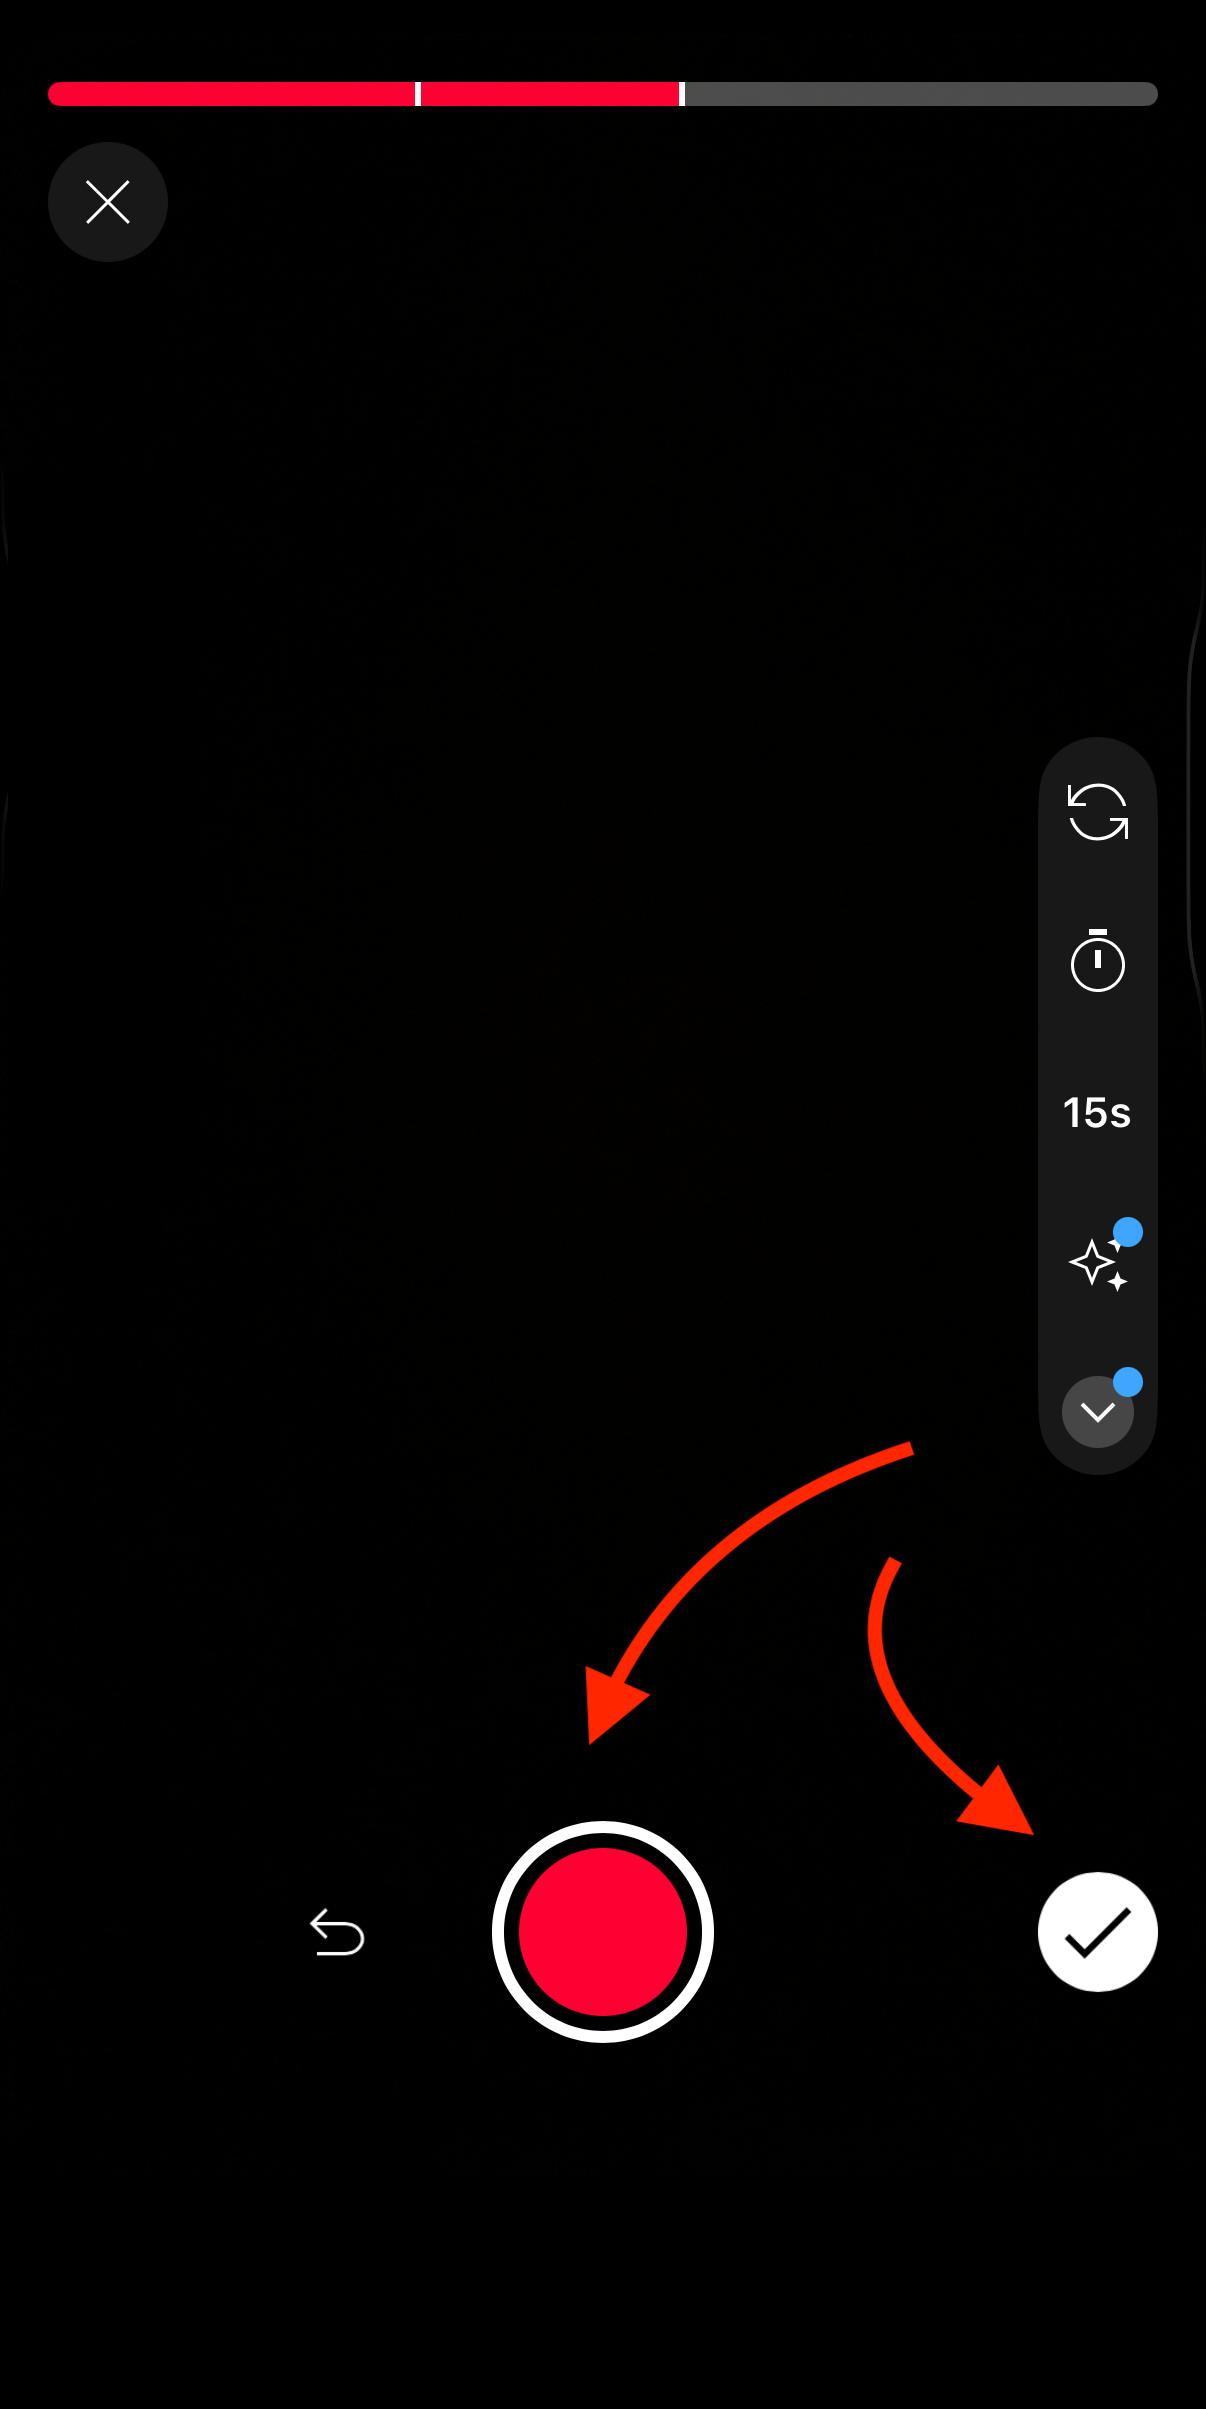
- You’ll be taken to a screen where you’ll have the opportunity to record yourself now. Choose how long of a reaction you’d like to post – the options are 15 seconds, 60 seconds, or 10 minutes. Press and hold the big red button in the middle and record your reaction.

- Once you’re done, click the red circle with a checkmark in the bottom right corner.
Watch your stitch to make sure everything looks the way you want it to. Once you’re happy with the results, click the red Next button.
- Add your final touches to the post, like an appropriate caption, hashtags, and don’t forget to give credit to the original creator.
Post!
Stitch Incoming On YouTube Shorts
YouTube Shorts has a cut feature – it is the closest you’ll get to the TikTok Stitch feature on YouTube. Similar to TikTok, YouTube allows you to use up to 5 seconds of another creator’s video.
Follow these steps to use the Cut feature and post your opinions, reactions, or commentary:
- Scroll your Shorts feed to find a video you’d like to “stitch”. Note that not all videos can be stitched, so you’ll need to find one that can.
- Once you’ve found the ideal video, click the Remix button.
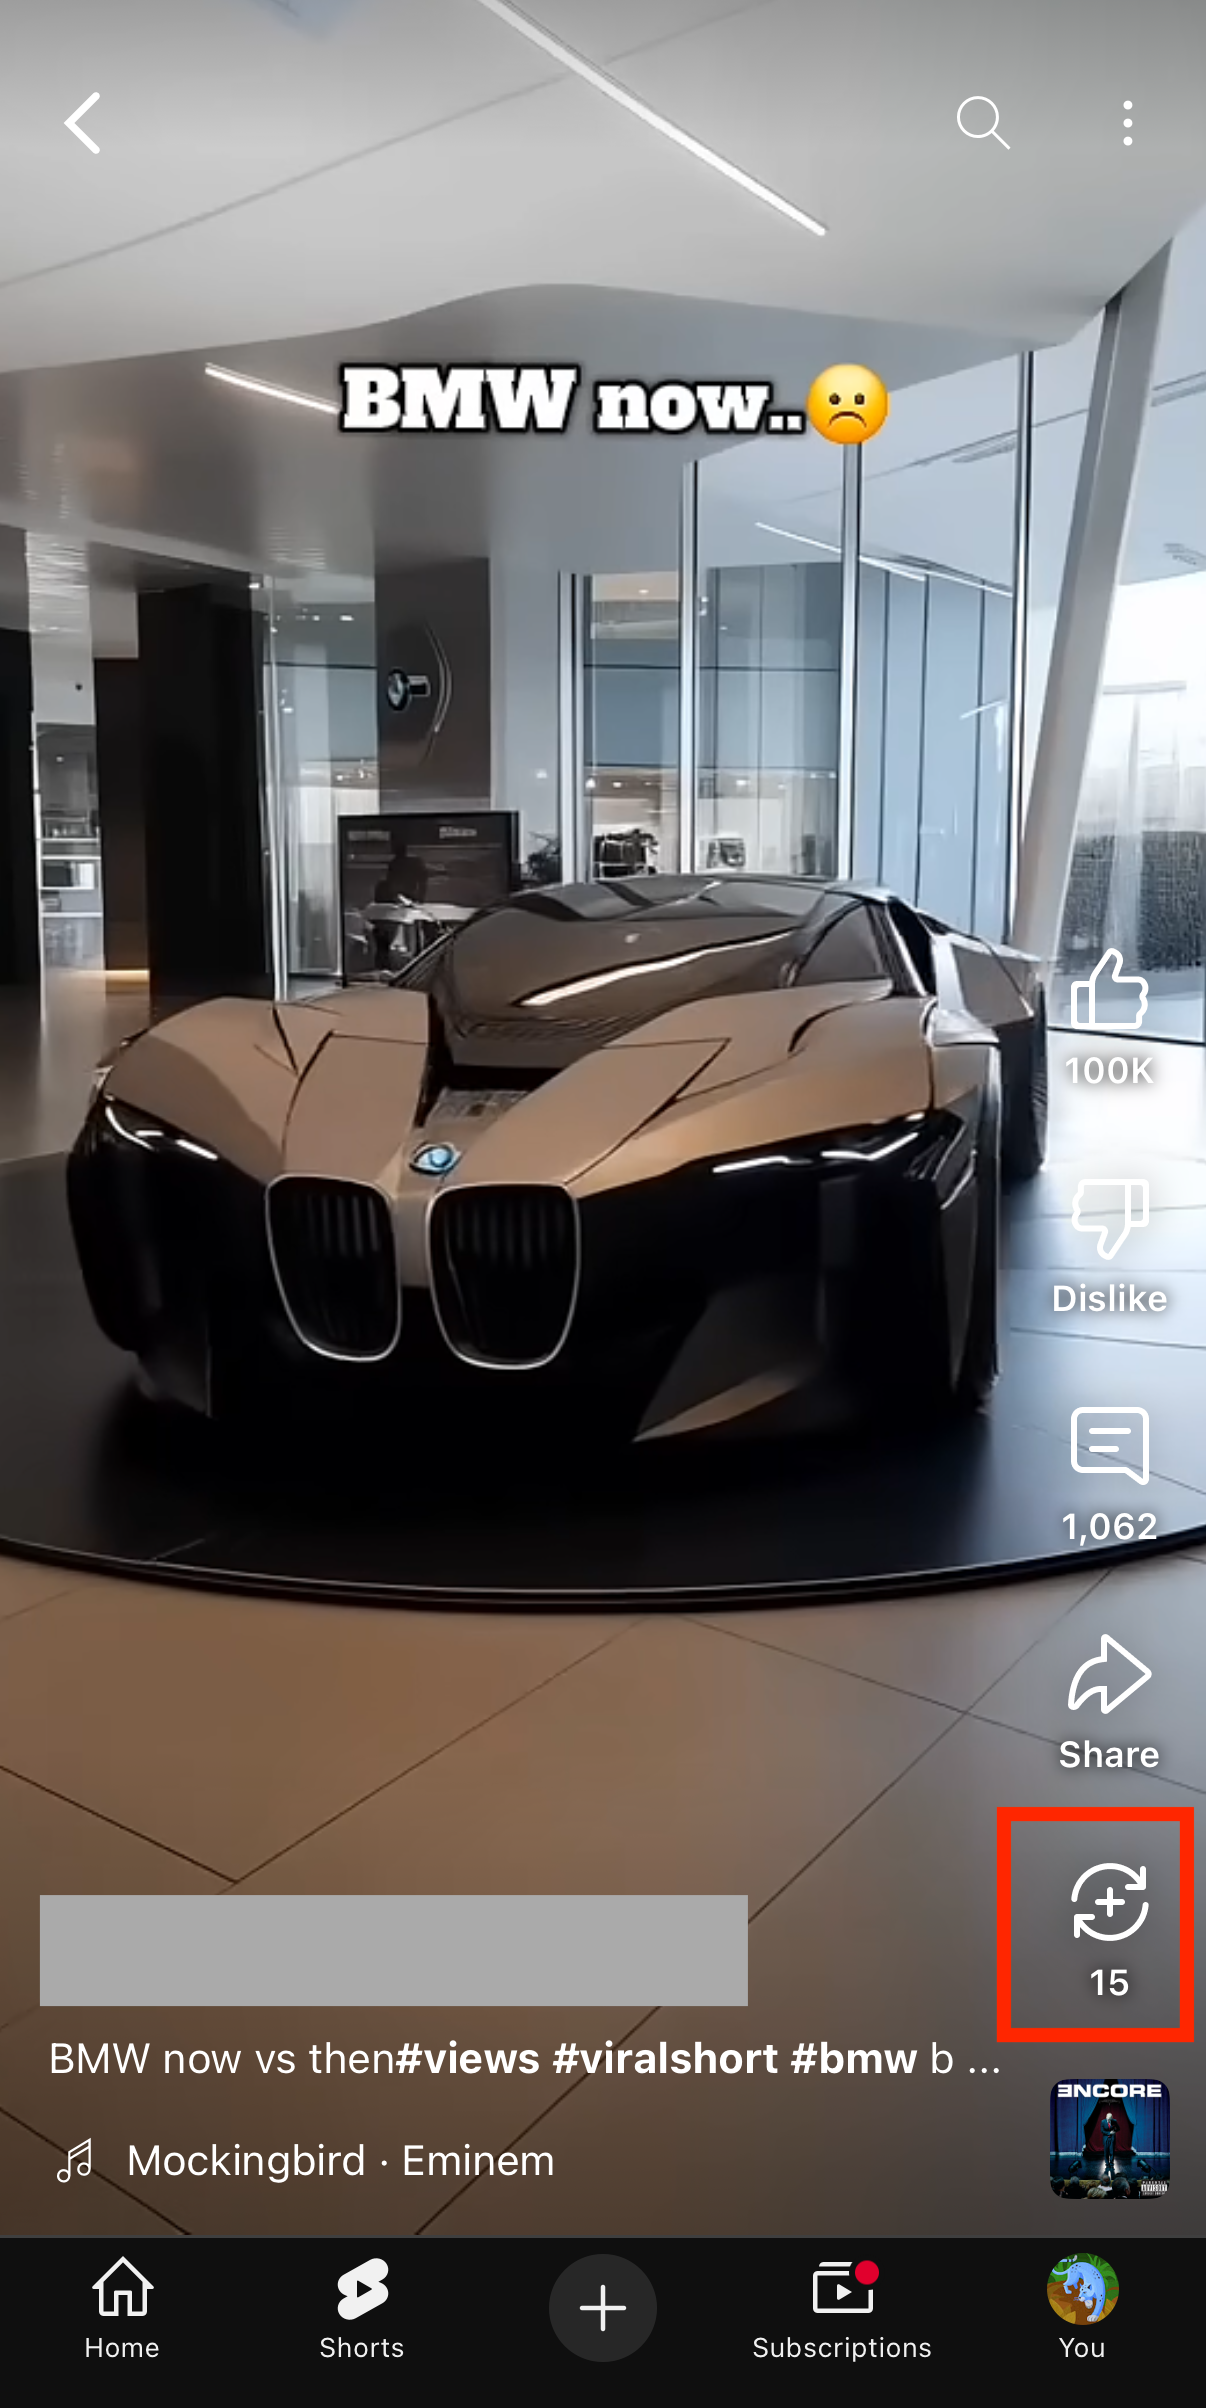
You should see five options – click on Cut This Video.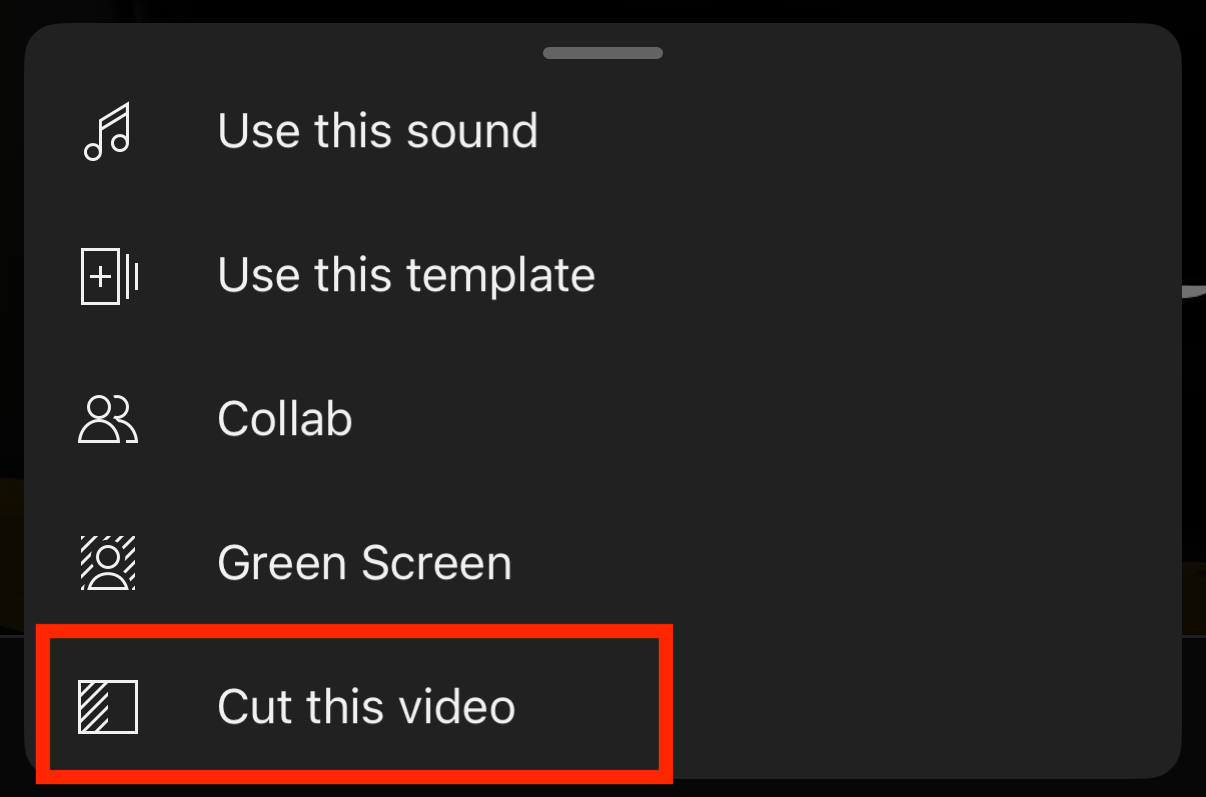
FYI: If you see only one option labeled “Use this sound,” that means this video is not eligible for stitching.
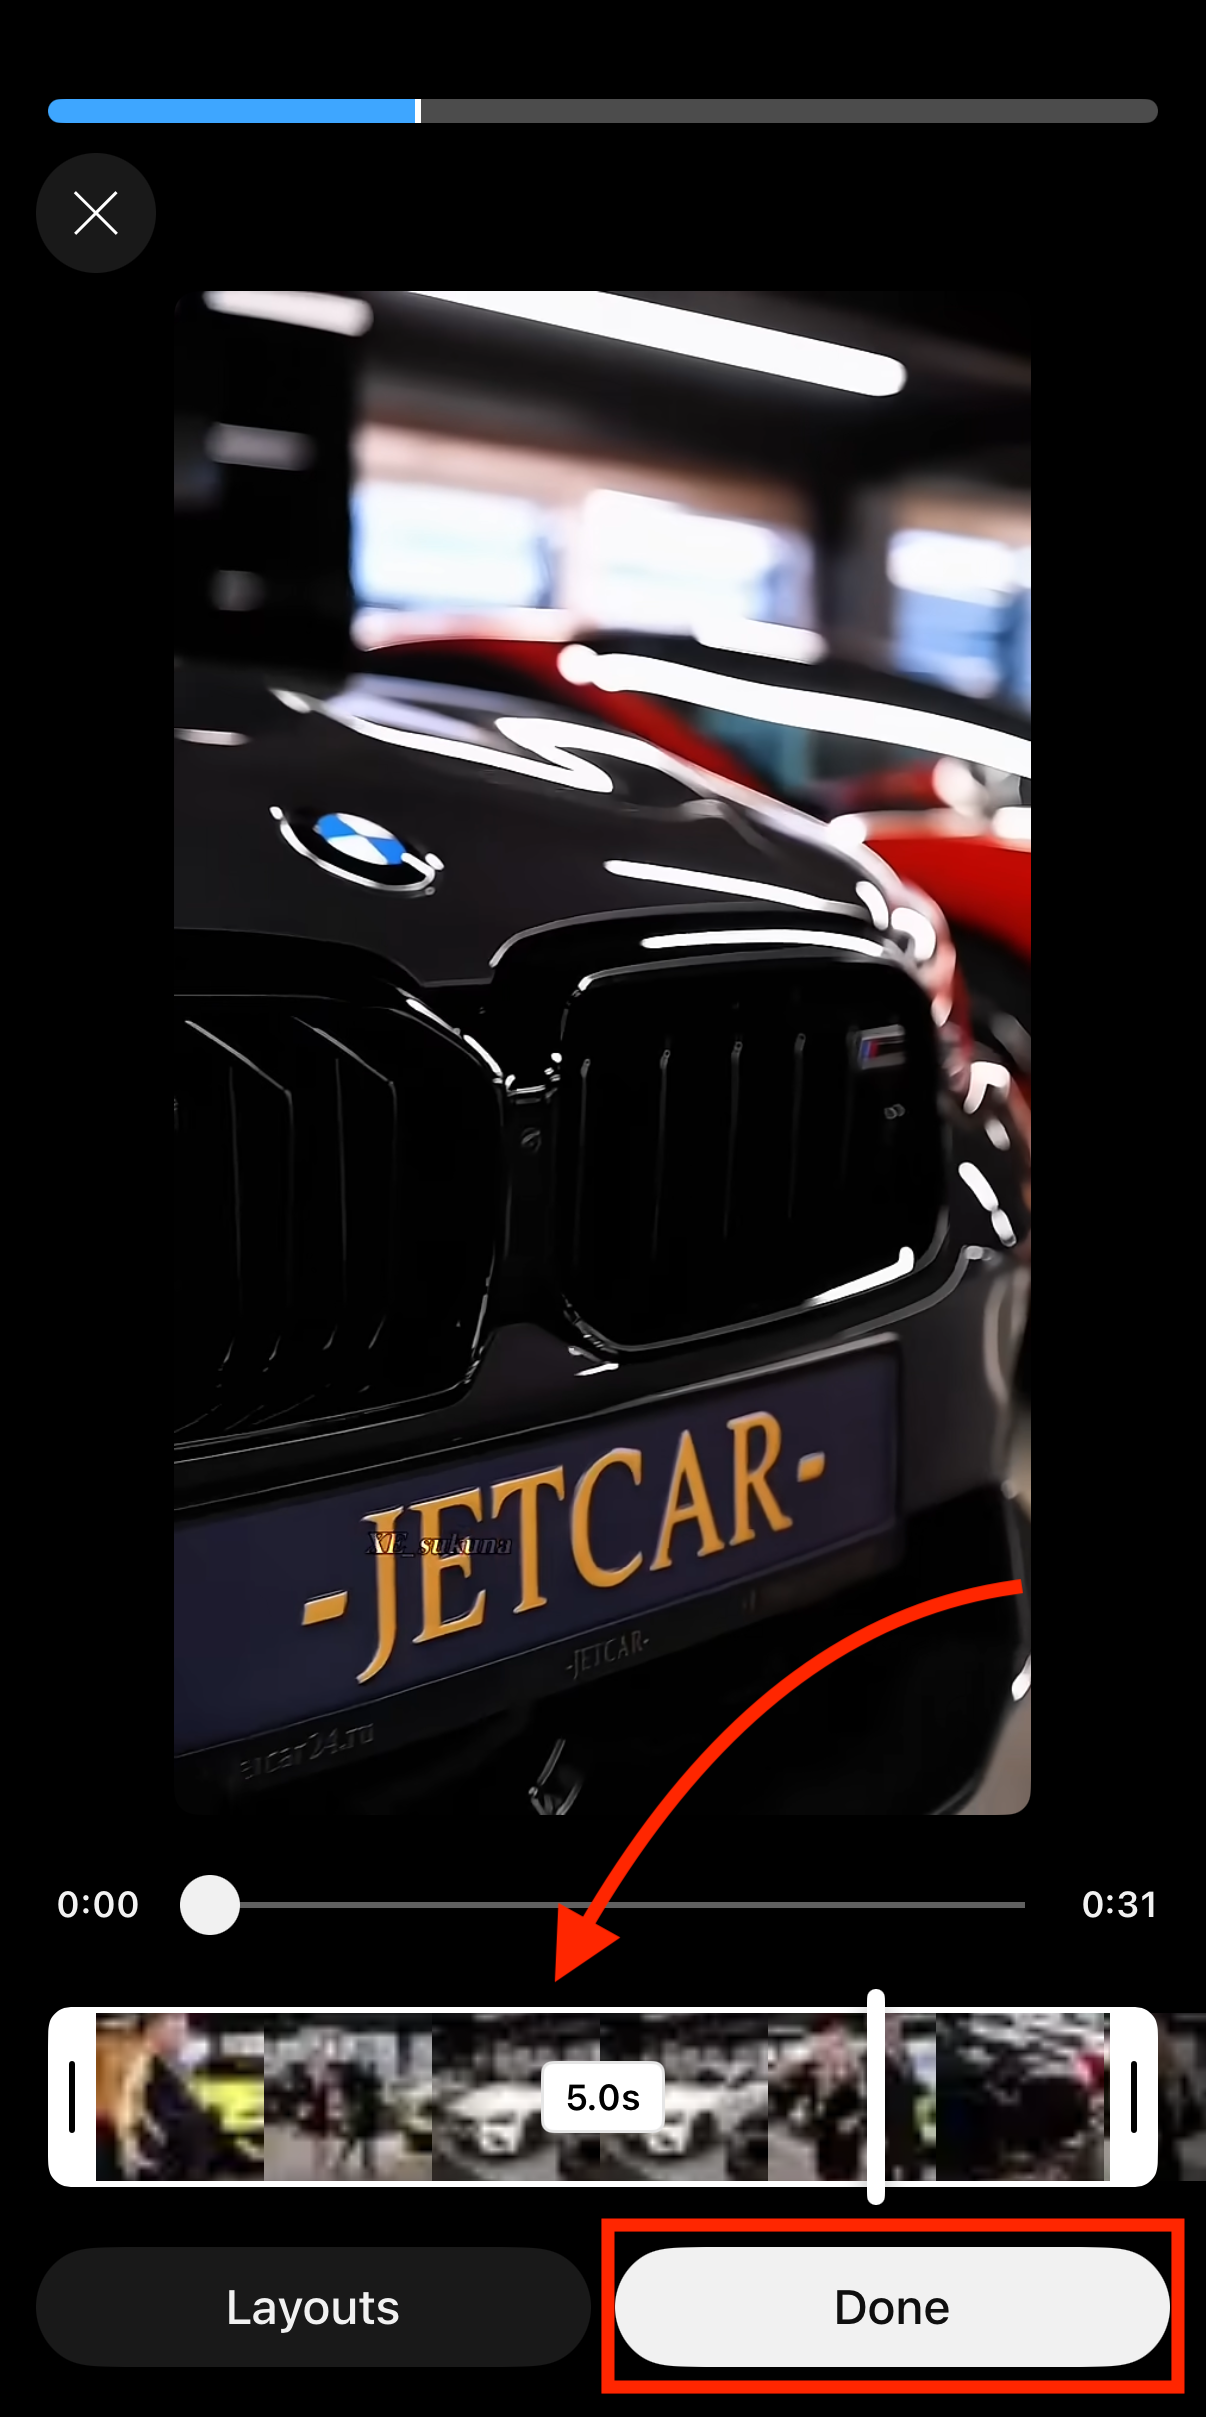
- Choose the desired 5-second clip on the trimming interface. Then click Done in the bottom-right corner.
- Record your own video by tapping the big red button in the middle, then click the white checkmark button in the bottom right corner. You can pause your recording at any time to take a break or when you are done by tapping on the middle button.
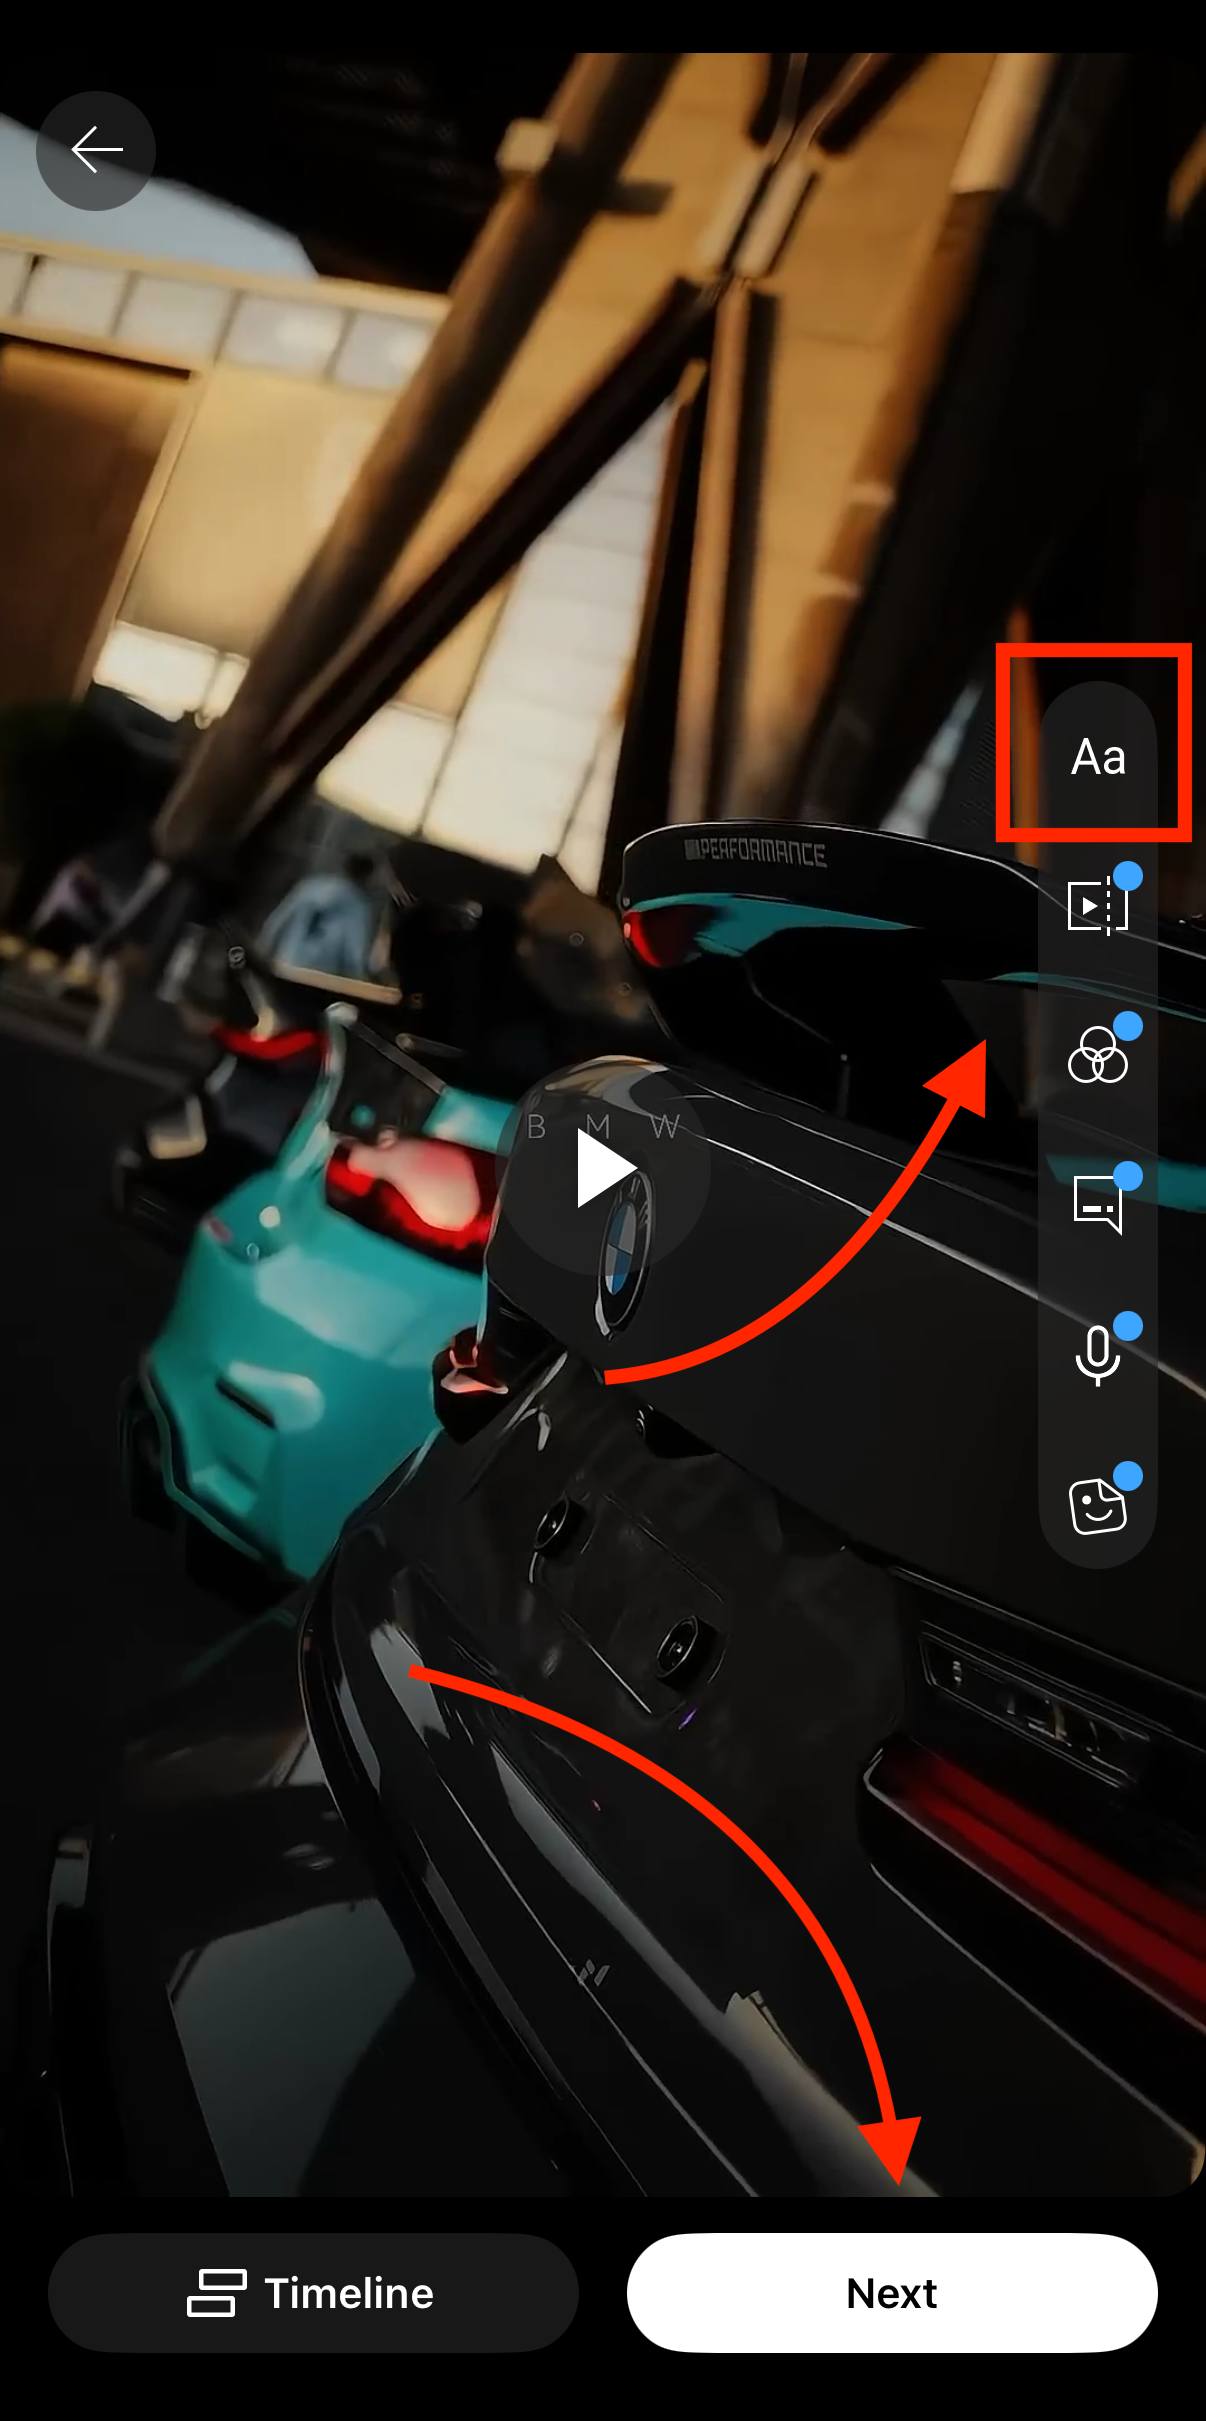
- Add your text overlay by choosing the text button on the right side of your screen. When you’re done applying the edits, click the Next button.
- Add your final touches like a caption and hashtags, and click Upload Short.

Stitch Incoming On Instagram Reels
The option closest to the Stitch TikTok feature on Instagram is Sequence. Here is what you need to do to mimic the “Stitch Incoming” trend on Instagram Reels:
- Find the Reel you’d like to use, and click the 3 dots at the bottom right.

You should see the following options: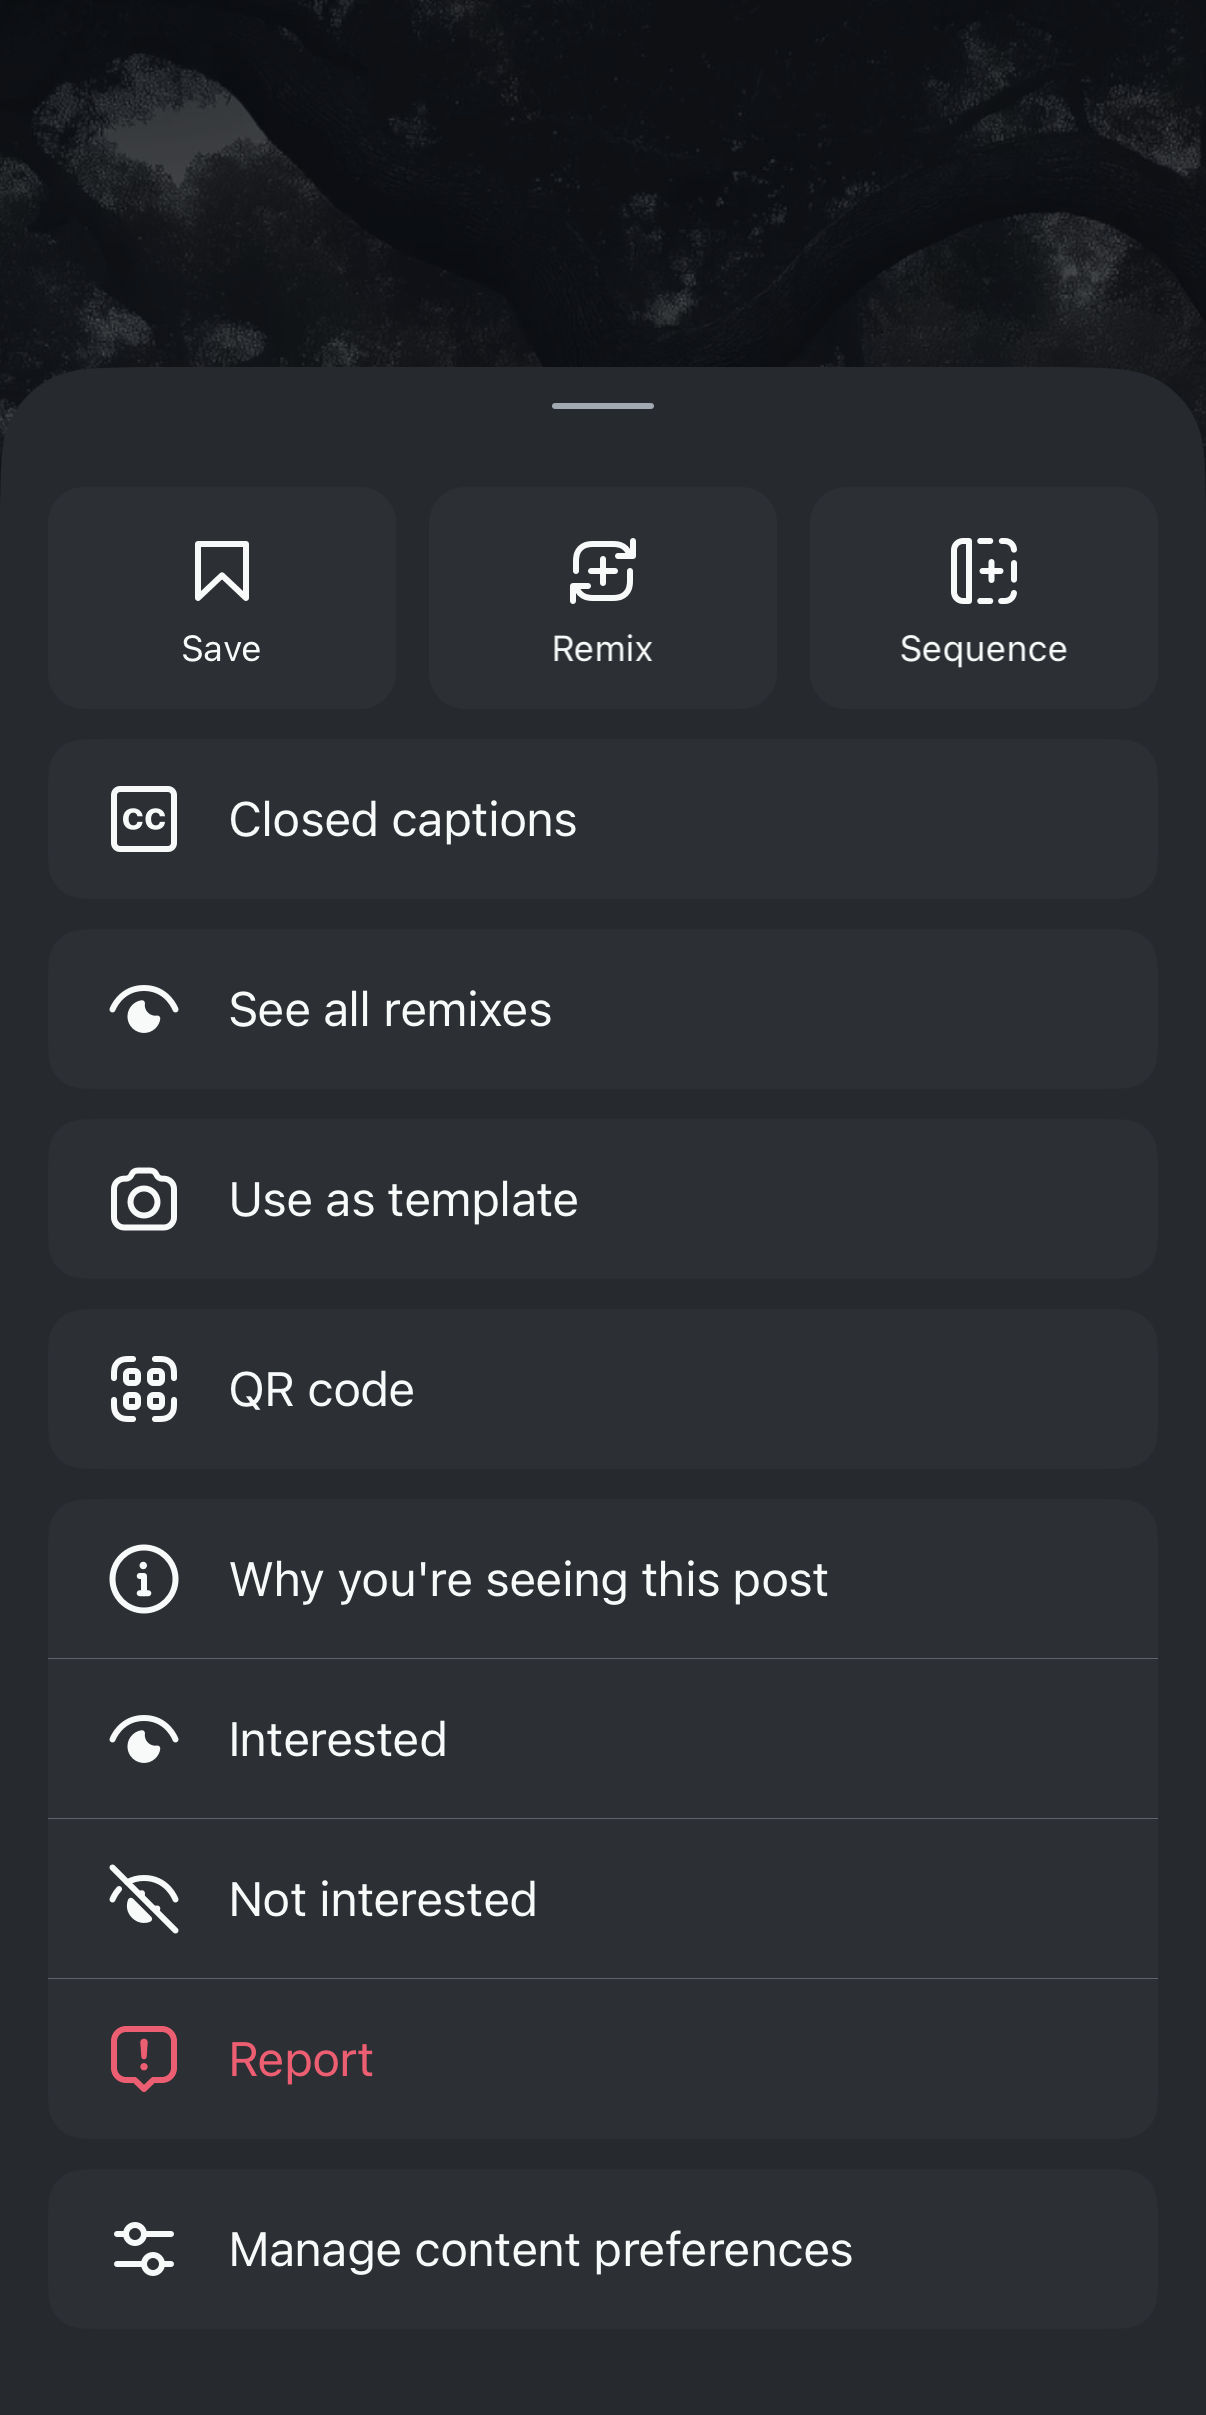
- Select Sequence.

Then crop the video if needed, or keep it at its original length. Then click the purple arrow button in the top-right corner.
- Next, you’ll see the screen where you can record your clip and add the desired edits. Tap the middle button to start recording. Tap it again when you are done, or if you need to take a break.

When you’re done, click Next. Watch the final product and make sure it fits your expectations. - Use the options at the bottom of your screen to apply the necessary edits, like text, music, emojis, and more.
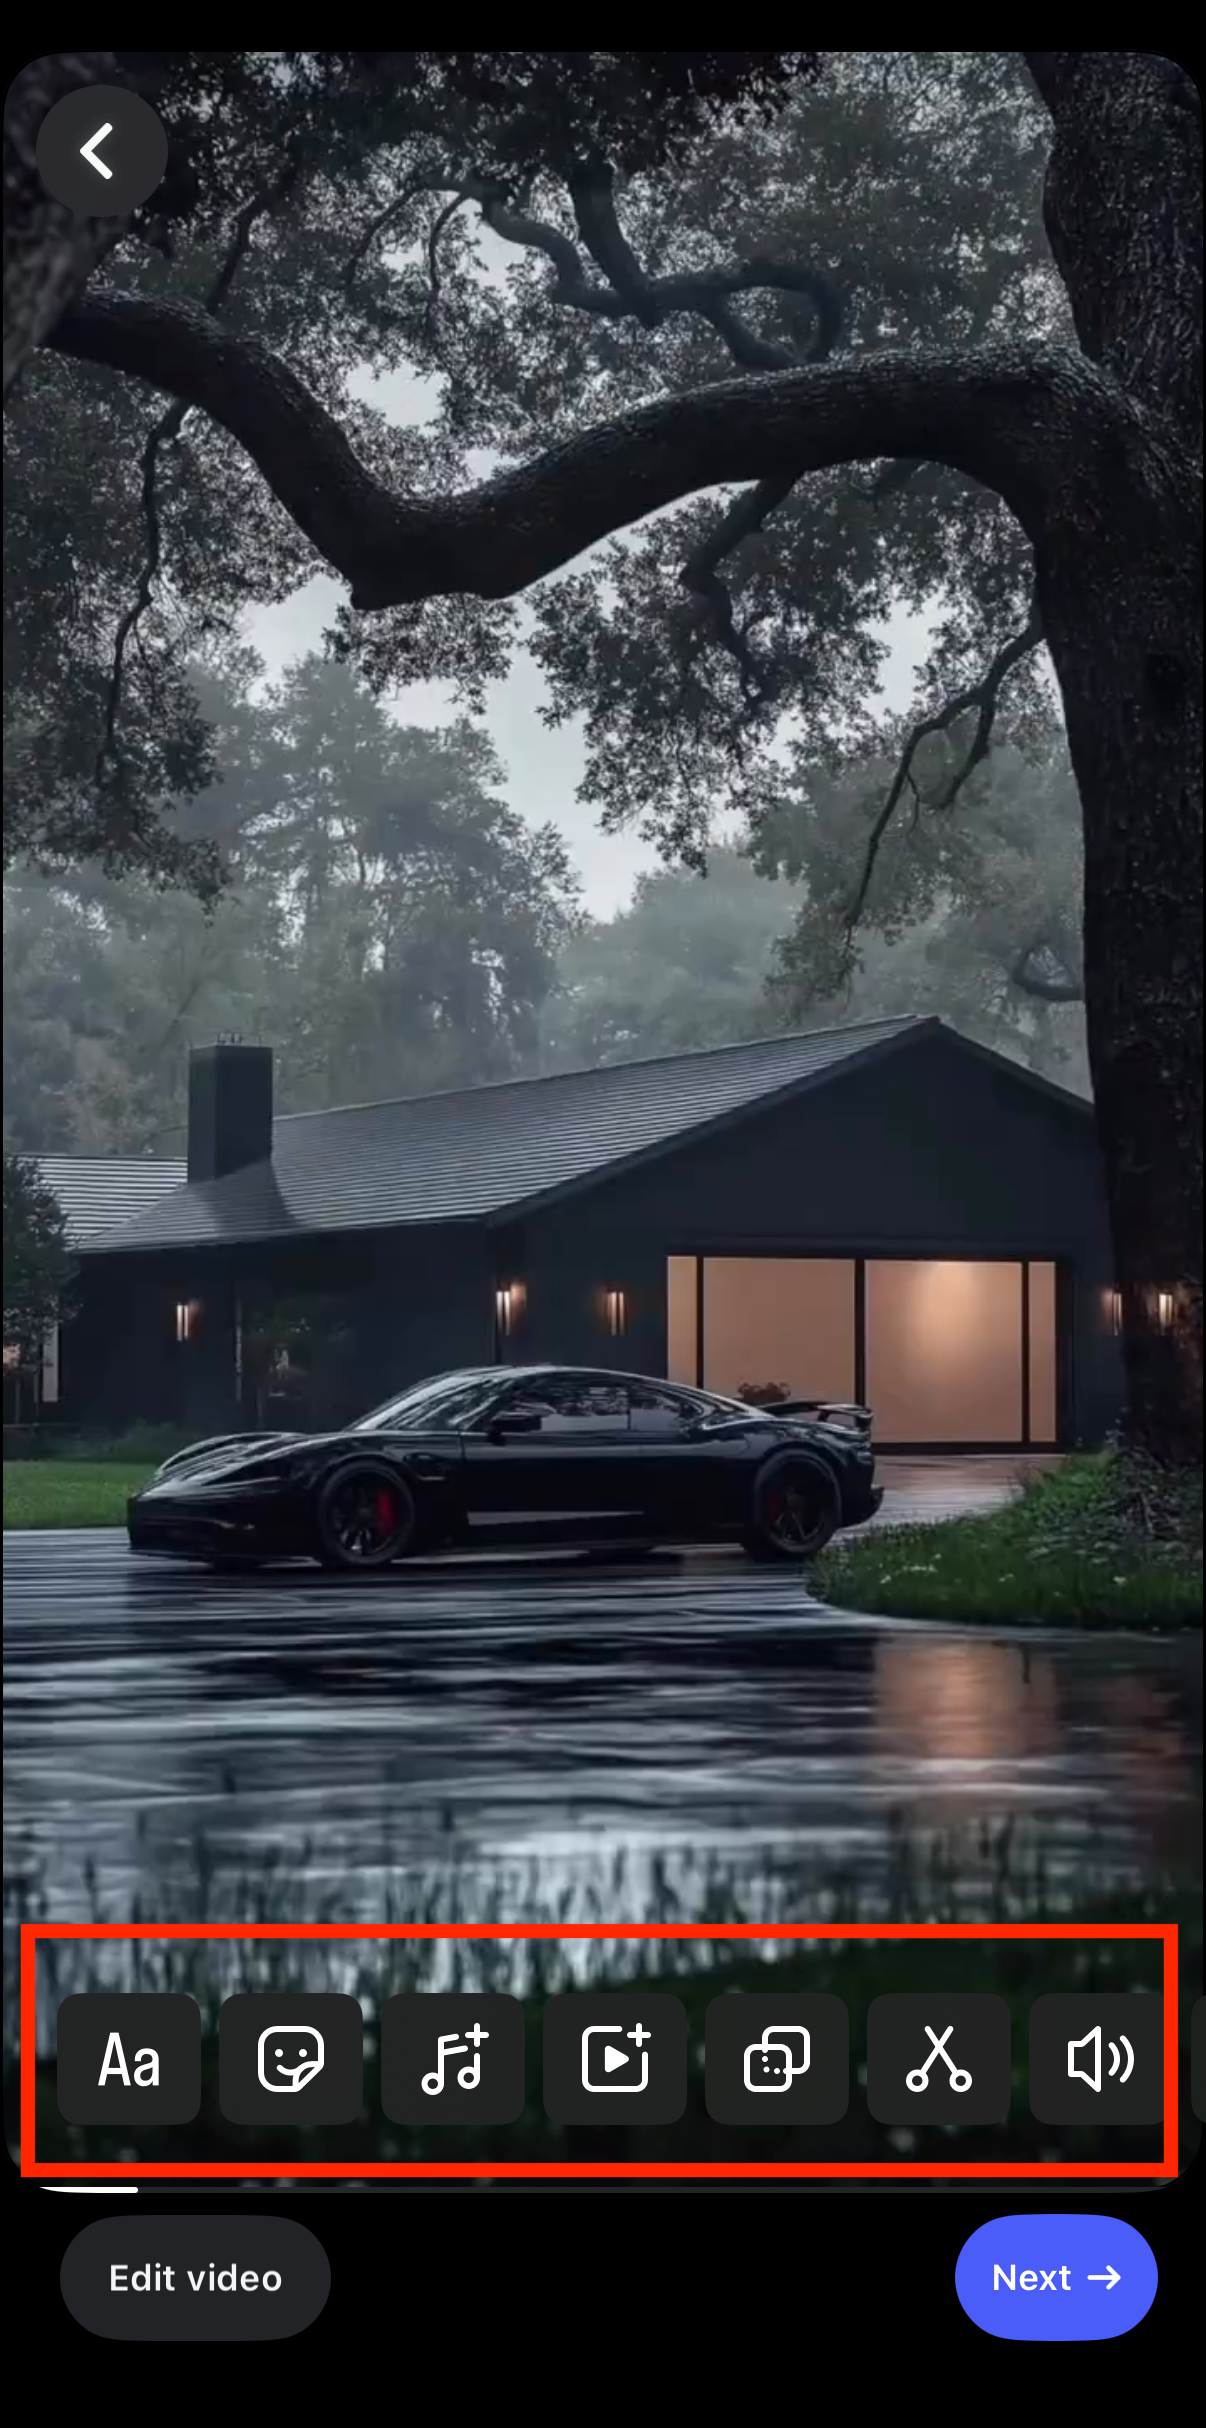
Hint: swipe up to crop your video.
- Click the Next button at the top or bottom right.


- Add your caption, hashtags, and other necessary details, and click Next.

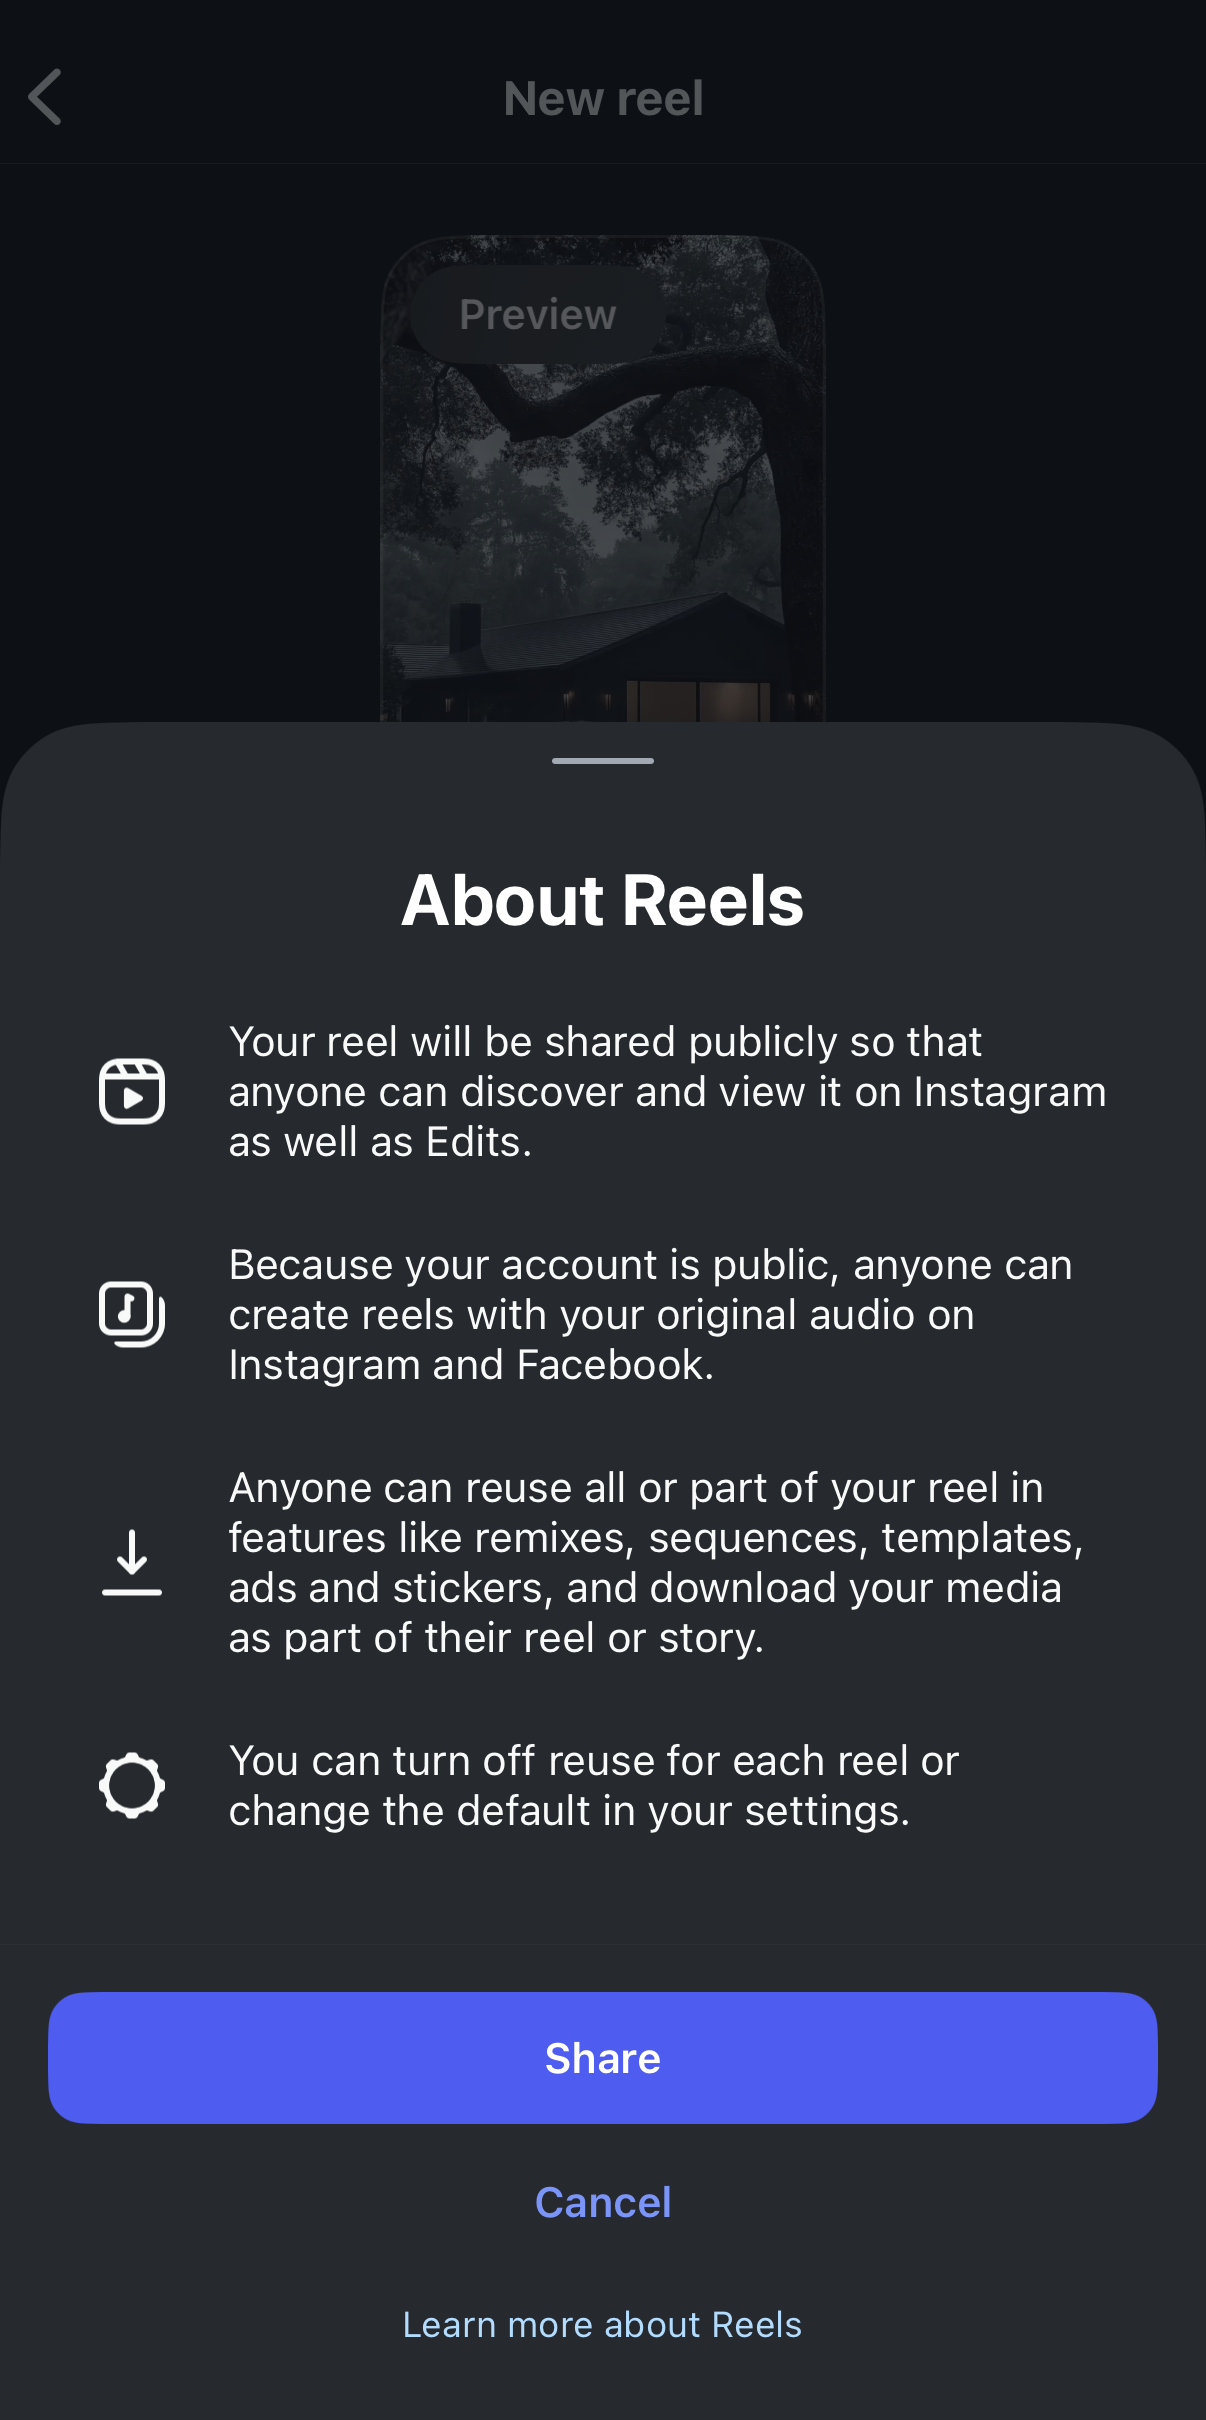
- You’ll see this screen ⬇️ – Click Share!
Quick Tips To Make Your Stitches Stand Out
- Be authentic
- Add value
- Participate in broader trends and topics
- Choose your videos and words wisely
- Add text overlay
- Encourage engagement
Today, we analyzed and provided a practical, step-by-step guide to participating in the Stitch Incoming trend across three major platforms: TikTok, Shorts, and Reels.
This trend offers a good opportunity to share your expertise, engage with your audience, and just have fun with content. Try it out for yourself and let us know what you think!
You may also want to check out some of our other marketing trends and tech news.
Subscribe to Vavoza Insider to access the latest business and marketing insights, news, and trends daily with unmatched speed and conciseness. 🗞️
And if you’re trying to scale your business through paid ads (but struggling to scale up profitably), read this premium article on how to overcome the anti-scaling loop.